
All developers use their maps in different ways.
Each has their own preferred project types, areas of interest, ideas for what a perfect opportunity looks like etc. which impact what a map needs to show.
So how do you build a map that works for all of them?
Easy. You help them to build it for themselves.
Customise your maps for better results
Adding your own data, notes, and plans to your maps is what lets you really unlock their value.
It helps you organise your work, focus in the right areas, and find the very best sites, faster.
That’s why LandInsight offers a whole host of tools to help you add to your maps, including things like measuring distances, drawing shapes, adding text and marking points of interest.
It’s a pretty varied toolset, so here are some of the ways people are putting them to use.
10 ways to start customising your maps now
-
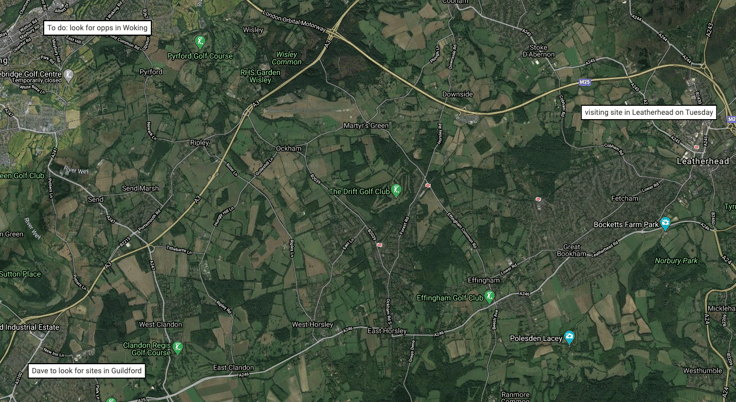
1. Leave notes for yourself (and colleagues)
In a pre-digital world, scribbled messages or hastily-jotted sticky notes were invaluable for their flexibility. Now, textboxes are a great way to recreate that experience to share those notes wherever people are working.
Label opportunities. Share intel. Record finance info. Post reminders. Write anything you want – it’s your map.
And the text you add will only be visible one zoom level up or down from where you save it, so your nationwide notes remain separate from your site-specific suggestions.
-
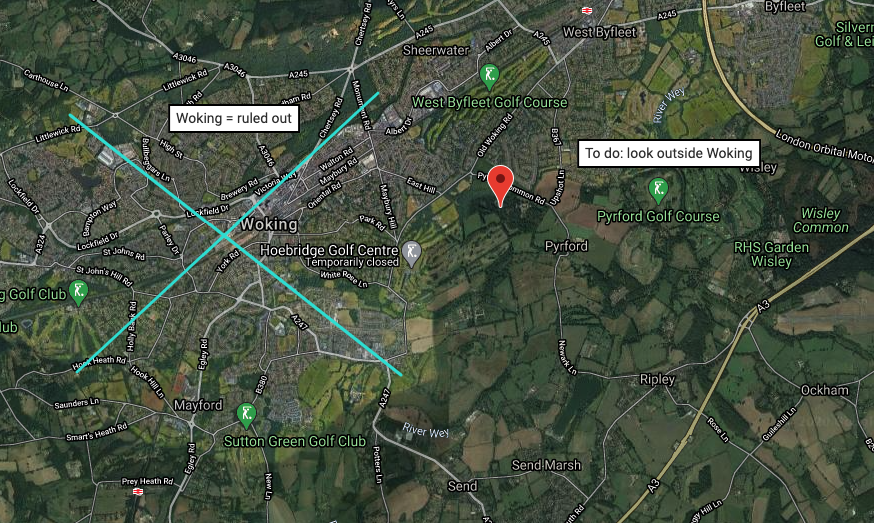
2. Rule out areas you’re not interested in
If you know a particular area is no good (say the £/sqft is too low to be worth considering, or you know a rival is already working on a project there), you need a way to rule it out entirely.
Simply mark it off on your map. Throw a boundary, add a note as a reminder, and you’re done.
That means you don’t waste time considering sites that have no potential for you.
-
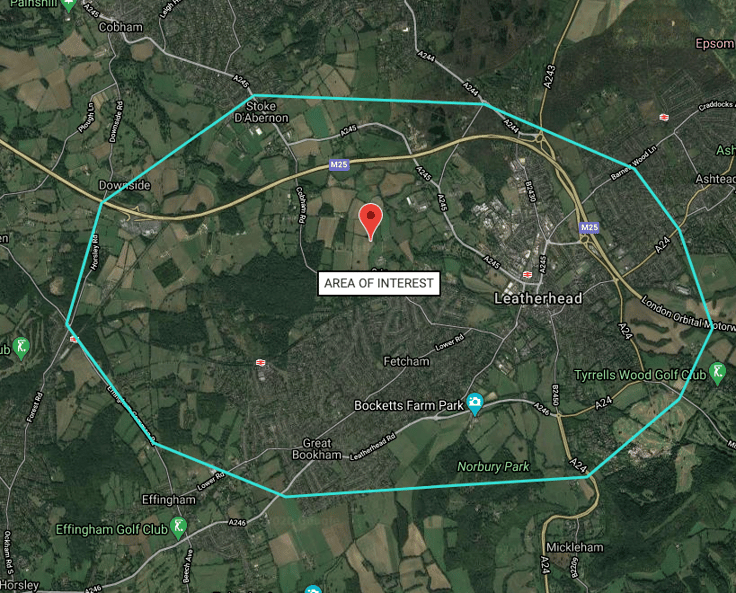
3. Mark out areas you ARE interested in
Then there’s the opposite – got a particular area that a project needs to be in (say, within a particular radius of the local station)?
Simply draw a boundary so you know where to look.
That means you can focus your time where it can deliver the biggest return.
-
4. Plot grids to search areas efficiently
When you’ve got those areas of interest, you can even boost your search efficiency.
Manually add lines to create a grid system so you can methodically search out every potential option.
It helps when dividing up the work with colleagues (or just making it feel less daunting for yourself).
-
5. Make a note of undevelopable plots
Even if a site is in the right area, there are any number of reasons it could be wrong for you – like if there’s a mineshaft there that scuppers your plans.
Mark it on the map so a few months down the line you don’t accidentally spend time looking into it again after thinking “but this one looks perfect – maybe I just missed it last time?”
-
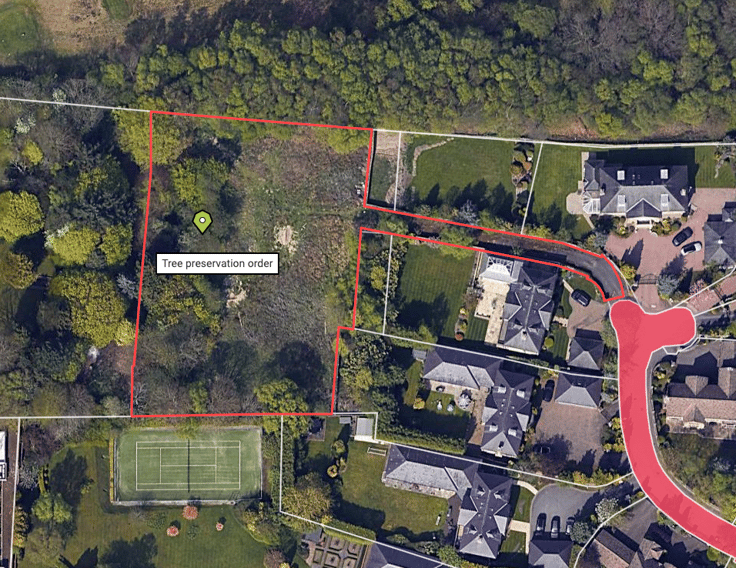
6. Keep track of site-specific features (e.g. Tree Preservation Orders)
Some features (like a protected well or a Tree Preservation Order) might not mean you have to rule out a site entirely, but it might affect the layout of what you could build there.
Drop a point-of-interest pin where the feature is so you can plan the site around it and get a more accurate estimate of the impact it could have on the site’s potential.
Then you can plan the site accordingly (or rule it out entirely).
-
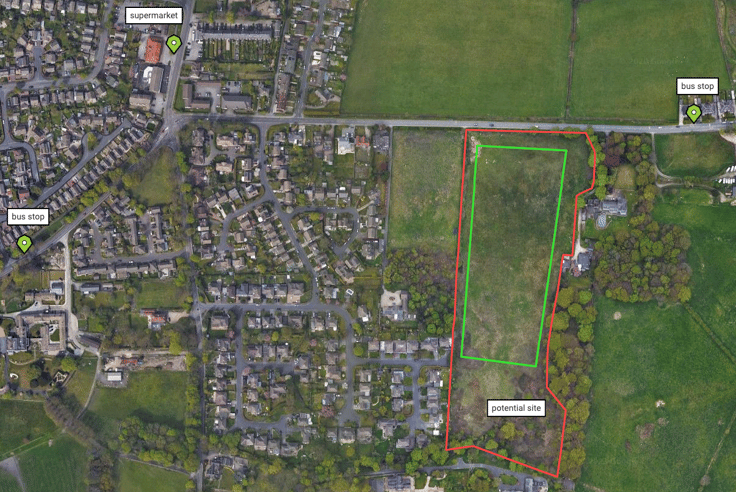
7. Add important additional data for your projects
Different project types can have specific information requirements that you need to add. It might be things like power cable locations, or something as simple as where the nearest bus stop is if you’re planning a nursing home.
Dropping a note onto the map with all these details means they can live in one place, rather than many.
It’s a quick visual reminder of some useful information.
-
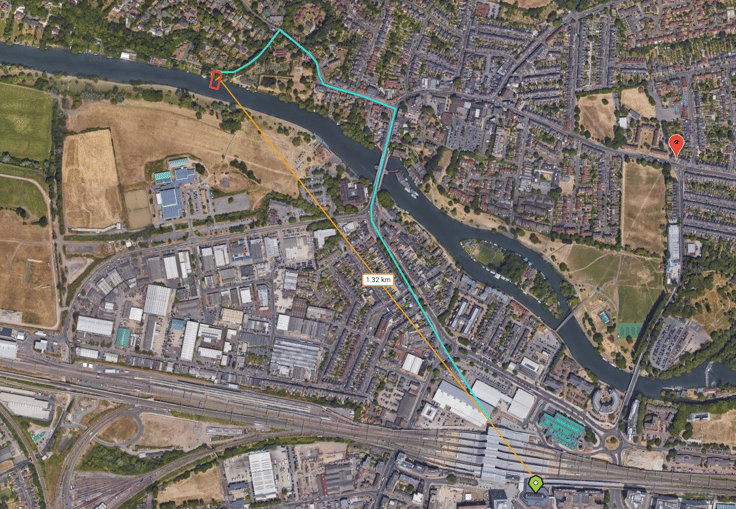
8) Measure (and record) important distances
Add notes and reminders for important distances you need to know, or good selling points (e.g “less than 250m to the local supermarket”).
Use the Ruler – for a simple A to B distance as the crow flies
Use the Line – for a multi-point distance, such as if travelling by road
-
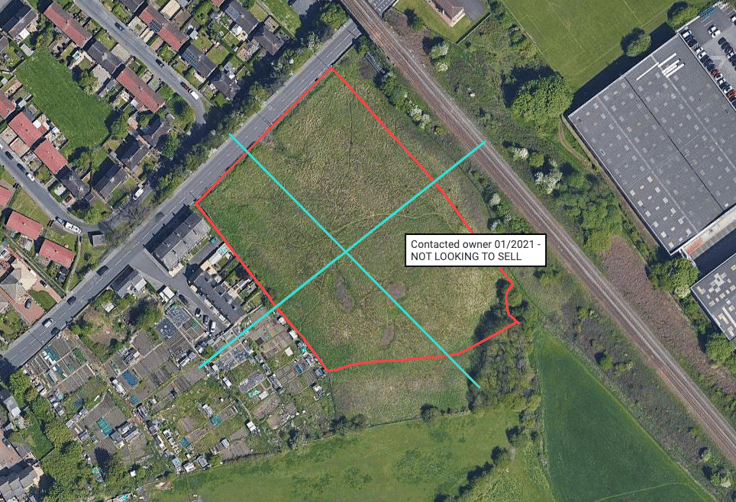
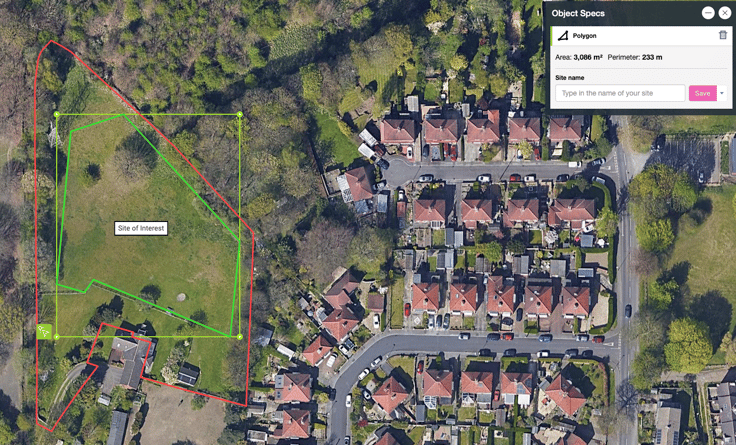
9) Get accurate measures of sites and their potential
You can measure out areas for yourself (say, if you’re planning a land assembly).
Draw the shape and get an accurate reading of the perimeter and the area. Then you can play around, seeing how much extra you’d get by adding another site in too, or what the impact would be if one of the owners said no.
That means you know where you stand before you make the approach.
-
10) Map out what you could fit on a site for yourself
You can even map out the potential builds too.
Outline the site and draw out the building sizes you’re planning to see how many could fit. Then play around with them, like seeing how adding a driveway to each one would impact how many you can fit in.
Give yourself a quick, easy way to come up with some preliminary plans to take to the next level.

What else can you do with the tools? Whatever you need.
These are just some of the ways the customisation tools can be used. But in truth, there are as many uses as there are developers.
How will you put them to use?
These tools are available for all users across all plans.
Not already signed up? Chat with us now so we can find the right plan for you.